Drainage For Unusually Wet Properties
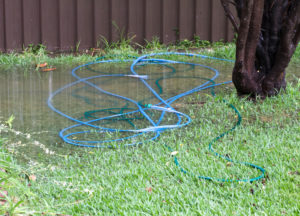
If you have an unusually wet property, this time of year might be your least favourite.
Even though the sun is out and every day is a little warmer than the last, all you can think about is the saturation in your back yard and the moisture pushing in on the foundation of your home.
The soil on your property is like a sponge – it can only absorb so much water. When it hits the limit, the water does things you don’t want. Your basement floods, your landscape erodes – generally bad stuff happens.
But it doesn’t have to!
You can control the way water moves around your property. Ditch your dread of spring with a ditch (we did that on purpose) that acts like a gutter and downspout inside the soil in your yard.
Install a drainage trench in your yard that collects the excess water and transports it to the lowest part of your land, away from your home and expensive landscaping.
How it works
Thousands of gallons of water probably flow downslope in the soil toward and through your property. You need to collect and channel it just like a gutter collects snowmelt or rain.
All you need to build is a simple trench that can be anywhere from 2 feet to 10 feet deep.
The most important factor dictating the depth of your trench is:
- The elevation of the lowest spot on your property.
The trench relies on gravity to move water, so you need enough fall (drop from the top of the trench to the bottom of the trench) to make sure the water flows through the trench to the lowest part of your property.
What supplies do I need?
You need:
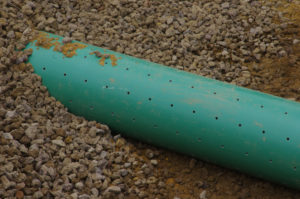
- Perforated drain pipe with a sleeve to stop sediment from clogging the drain and a cap for the high end.
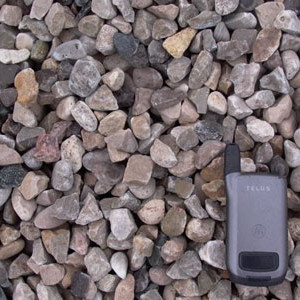
- ¾’ drainage stone or 3/8’ washed peastone (whichever you prefer, as both work well). Enough to fill up most of your trench.
- A non-woven geotextile to wrap the stone and pipe to keep clean.
- A trencher (you can rent from any hardware rental store), or a shovel and some elbow grease.
- A hand tamper to lightly pack your backfill on the surface.
The trench should run in a line that protects your yard, your foundation and your basement. It’s a defensive substructure. An L or U-shape might work best, if your property slopes at multiple angles.
The trench should become level right at the lowest point on your property. It should look natural where it meets level ground.
Dig the trench, place the wrap, lay the pipe, fill with stone.
Water always takes the path of least resistance.
After your trench is dug:
- Line it with the geotextile wrap (sold as commercial filter fabric in some places).
- Run the drain pipe from end to end (don’t forget to clip on your cap at the high elevation).
- Fill the trench with stone to about 3 inches below grade.
- Fold the wrap over the top of the stone, so the stone and pipe are completely protected.
Since the stone is easier for water to get through than smaller, denser sand or clay particles, that’s where it’ll go.
The trench can be as thin as 6 inches and it’ll still do a great job.
Now you have a trench with a pipe and some drainage stone or peastone wrapped in fabric.
Take some of the material you excavated and cover the last inch or so of trench, then pack it down lightly with your hand tamper.
Don’t get too vigorous – it doesn’t happen often, but some homeowners crush their new drainage pipes by getting aggressive with the packing.
And just when you thought you were done…you are.
It’s a job you can complete in a single day and will help your family avoid thousands of dollars in repairs from a flooded basement or washed out landscape.
Grab the stone you need (we’ll help you figure out exactly how much you should get) from us today so you have all the supplies ready to get your trench done this weekend.
Call Grand River Natural Stone or stop by to talk to a member of our team. We’ll get you started off right.
